

How to automatically free up disk space in Windows 11
How to automatically free up disk space in Windows 11
Yous always want your PC to take as much storage as possible. Having a well-nigh-full difficult bulldoze will cause information technology to deadening down. This is bad no matter if y'all're using your PC for work, watching movies or playing video games. Even if you have a big corporeality of storage, the time will somewhen come when y'all'll demand to delete files to complimentary upwardly disk space. Thankfully, Windows 11 has a handy characteristic that automatically deletes files for you.
The feature in question is called Storage Sense. Actually, Storage Sense exists in Windows x and is also present in Windows eleven. This how-to will go over the fastest way to enable Storage Sense so that you'll never have to worry about disk infinite again. The feature automatically removes temporary files, old downloads and system files. You lot tin also configure information technology to remove specific files so that you won't lose annihilation important in the procedure.
How to automatically free up disk space in Windows 11
1. Press the Windows tab on your keyboard and type Storage Settings in the search bar. Click on Storage.
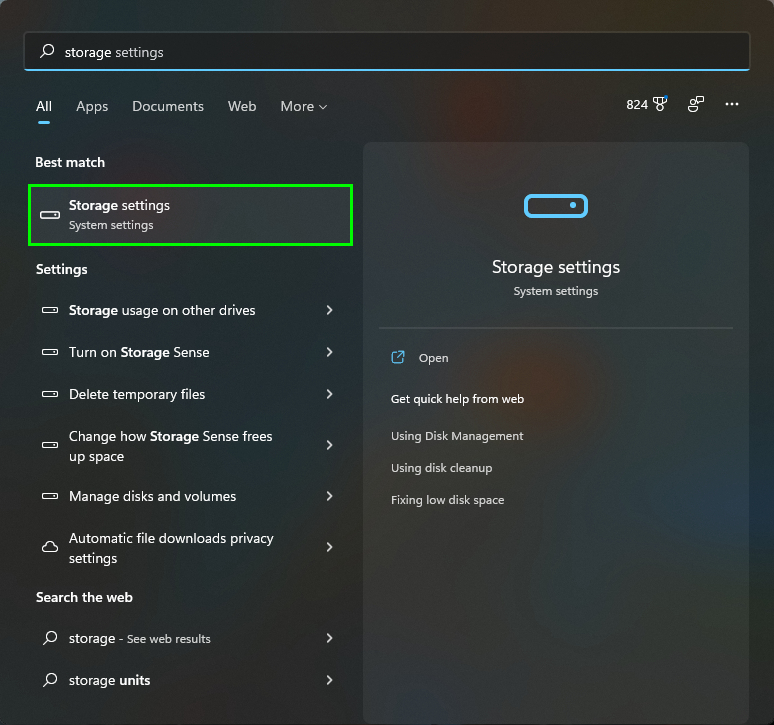
If you've never accessed this setting before, information technology will have a few seconds for your PC to clarify your storage information. Your total free retentiveness volition exist displayed at the top of the screen, along with everything you have in storage such every bit temporary files, apps and features and other. Click Show more categories to see a fuller breakdown of what'due south stored on your PC.
2. Flip Storage Sense from Off to On. By enabling this, your PC will automatically begin deleting temporary files, old downloads and emptying your recycling bin when it is running low on infinite. Best of all, this process happens in the background and then you can go along working without pause.
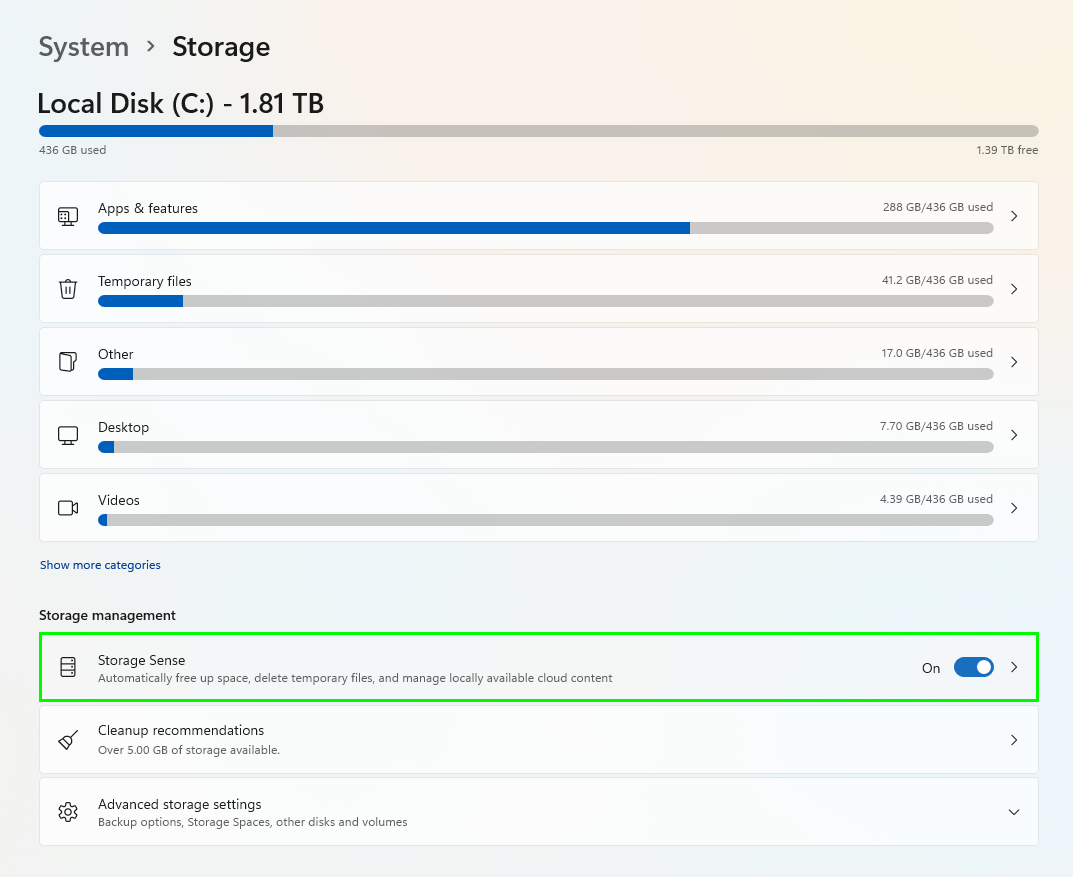
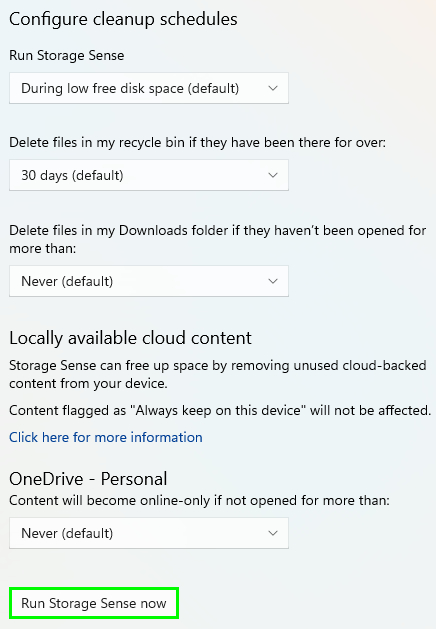
Clicking on Storage Sense brings up a few more options. If y'all're worried your PC will delete important files or simply want to configure Storage Sense further, this setting helps you tailor it how you see fit.
iii. Click Run Storage Sense at present to instantly run the feature. I managed to free up 8GB of storage simply past doing this. The procedure took less than ten seconds. Y'all don't demand to do this since the whole point of Storage Sense is to automatically delete files when you're running out of space. But it'south skillful having the selection to instantly start the procedure if that'south your desire.
The Cleanup recommendations feature beneath Storage Sense lets you lot free up even more infinite.
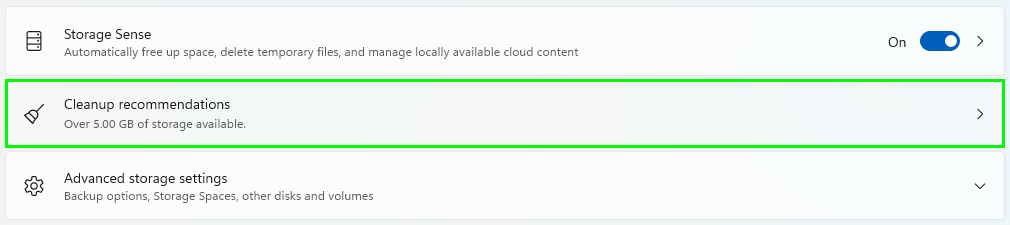
Clicking on this option volition initiate a system scan. After that, your PC will recommend files that you can manually delete. Non only can you delete some of the same files, but y'all can as well delete files synced to OneDrive.
Overall, nosotros feel that Storage Sense on Windows 11 and Windows x is an easy way to deal with old temporary files that may sit dormant on your hard bulldoze. It's also a great mode to call back less about PC maintenance.

Source: https://www.tomsguide.com/how-to/how-to-automatically-free-up-disk-space-in-windows-11
Posted by: spencercoccousturia.blogspot.com
0 Response to "How to automatically free up disk space in Windows 11"
Post a Comment