

How To Light Up Lego Sets
-
-
This guide illustrates several methods for using Brickstuff LED Light Strips to illuminate 2 LEGO® Modular Building kits: the Chiliad Emporium (10211) and the Pet Store (10218).
-
Although this guide addresses the LEGO® Modular Building sets, the lighting techniques described hither can be used to light any construction or cosmos.
-
-
-
Before you begin installing lights, it is important to plan your lighting layout.
-
Subsequently you've built your building, get-go looking for holes! Yous will demand to find as many pathways to run your wires as inconspicuously as possible.
-
Doors make a great pathway for wires to laissez passer between levels.
-
Stairwells are great ways to pass a large number of feeder wires.
-
If you are lucky enough to have a sub-basement or other pathway out the back of a building, consider yourself lucky!
-
After you've examined the possible pathways for your wires, information technology'south a good idea to examination-mount the lights and connecting cables, to make sure everything fits with a petty slack left over.
-
-
-
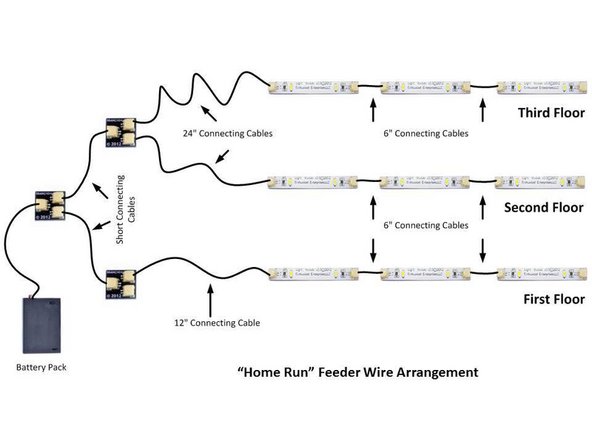
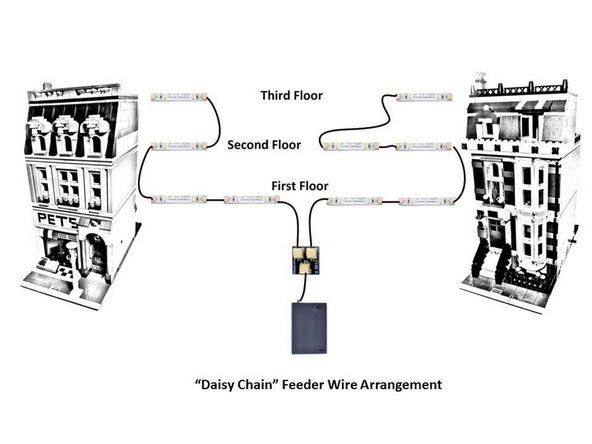
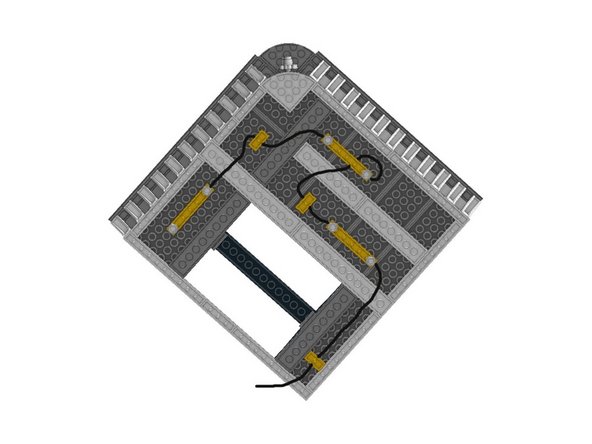
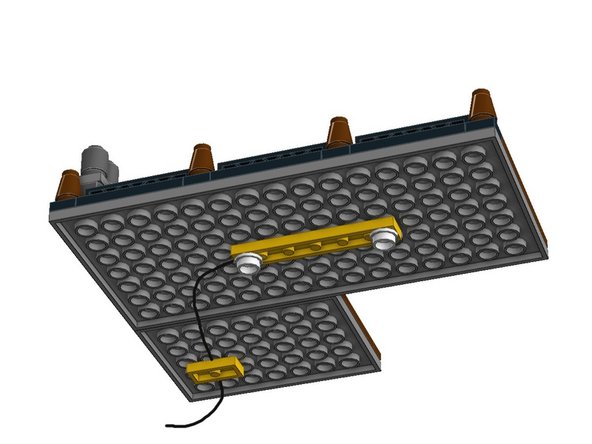
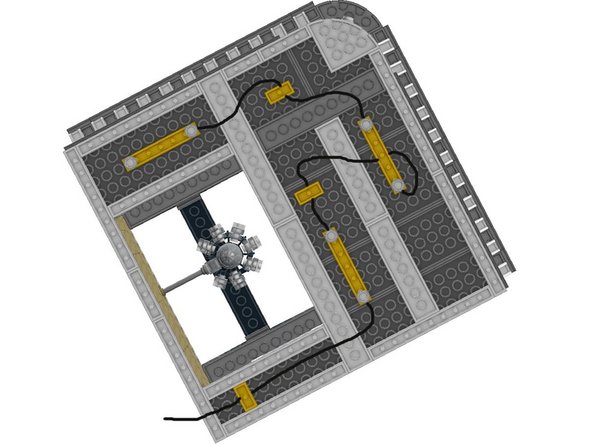
After you've identified paths for your wiring within the construction of your creation, you should determine on a wiring arrangement. There are two basic arrangements:
-
A "Home Run" feeder wire arrangement
-
A "Daisy Chain" feeder wire arrangement
-
The two illustrations in this step outline both of these arrangements in more item (click on the images to view larger).
-
In general, Abode Run feeder wire arrangements are improve when you want to command lighting independently (for instance, switching lights on and off on the third floor), or when you take a very large installation with 100 lights or more than.
-
Daisy Chain feeder wire arrangements are convenient when running lighting into multiple buildings, or when conserving cables and/or adapters I important.
-
When deciding on an system, it's a good idea to test both the Home Run and Daisy Chain designs, to see which provides the best overall effect.
-
-
-
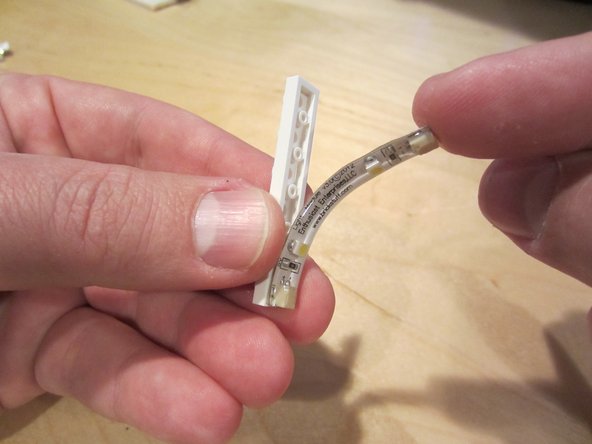
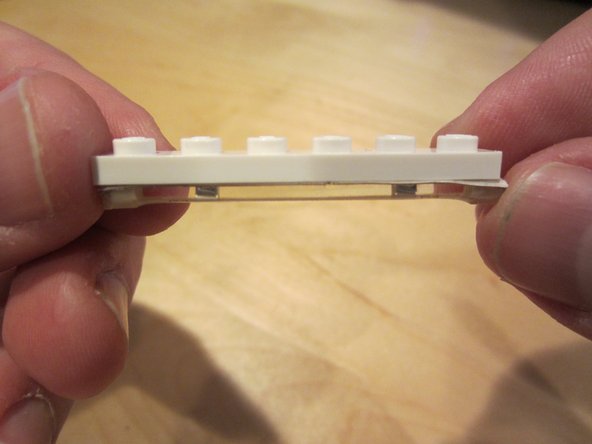
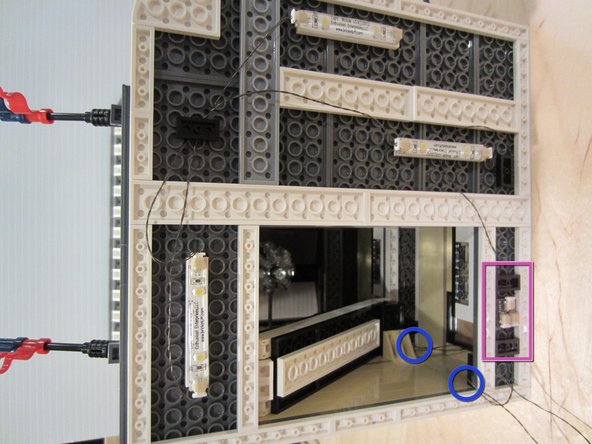
If you are using Brickstuff Lighting Strips, yous tin can mountain the lights using the self-adhesive backing.
-
If mounting in a LEGO® cosmos, we recommend attaching the Light Strips to 1x6 plates commencement-- this ensures a snug fit, just also allows for repositioning later if needed.
-
Every bit a full general dominion, you should avoid removing mounted calorie-free strips and trying to re-affix them to another surface-- the adhesive will wear out and strips may not stay in place.
-
-
-
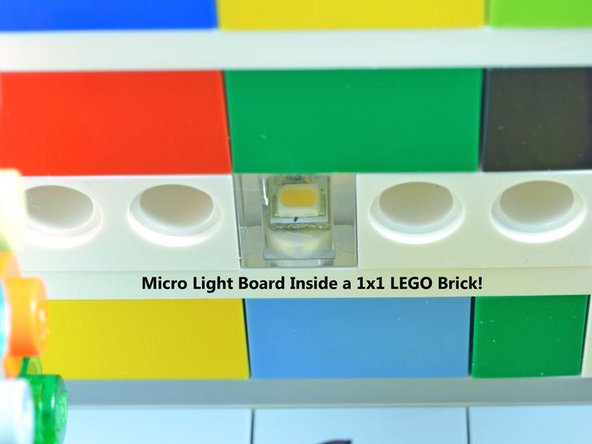
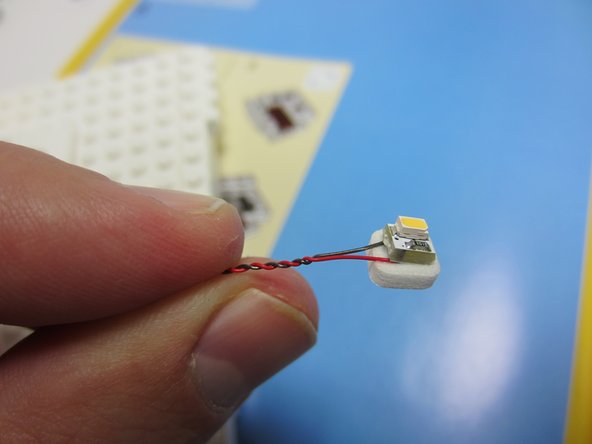
Brickstuff Micro Lite Boards have been particularly designed to fit inside a standard 1x1 LEGO® brick. Even if you are not mounting inside a LEGO® creation, you will appreciate the small 4x4mm size of the Light Boards-- they allow you lot to put low-cal just almost anywhere you demand it.
-
Depending on where you need to mount the Micro Calorie-free Board, it may be possible to install the board without needing to use adhesive.
-
If agglutinative is required to hold the board in place, y'all tin apply 1 of the self-adhesive squares that are supplied with each Micro Light Board kit.
-
If y'all need to install the Calorie-free Board into a round infinite that is smaller than the board itself (for instance, within a round 1x1 LEGO® brick), you can delicately sand the corners of the board. [invalid guide link] to view a usage guide that describes the sanding process in detail.
-
-
-
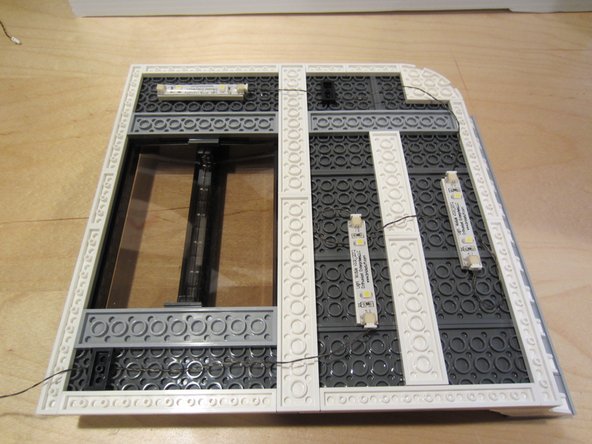
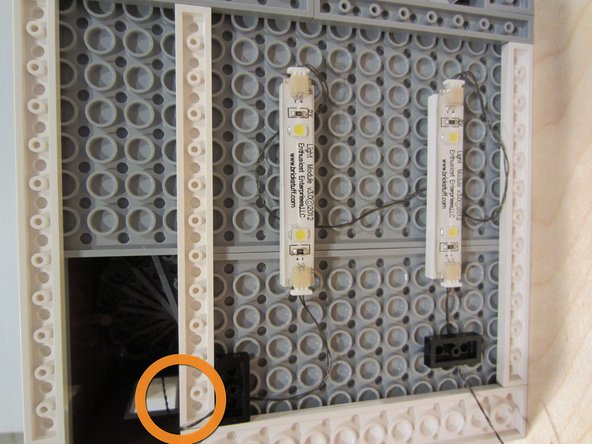
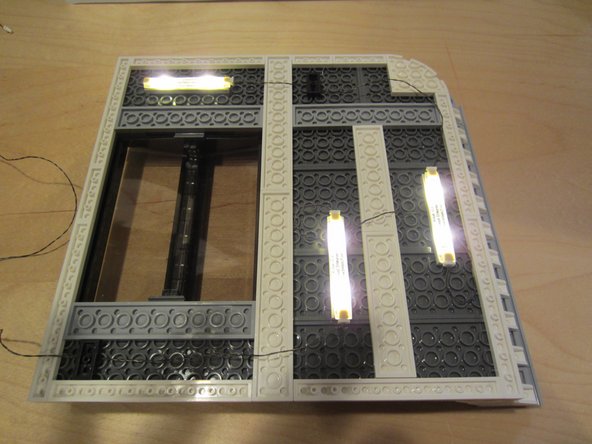
Regardless of the wiring arrangement you use, you should programme on using three Brickstuff Light Strips (or the equivalent of six LEDs) per flooring of a LEGO® Modular Building.
-
If you lot are not mounting your lights inside a LEGO® creation, or if your creation is non a building, you volition need to experiment a bit to discover the lighting mix that works best for you.
-
When mounting your lights, begin from the meridian floor of a edifice (or the least attainable part of your cosmos) and begin installation at that place.
-
On each floor of a edifice (or in each department of a creation), it is all-time to daisy-chain lights.
-
If mounting in a LEGO® cosmos, you tin utilise 1x1 LEGO® plates to concur the connecting cables in place.
-
Note that yellow bricks have been used in the illustrations to the left-- this was merely for emphasis. We recommend white plates for the Lite Strips and black plates to hold wires in place.
-
-
-
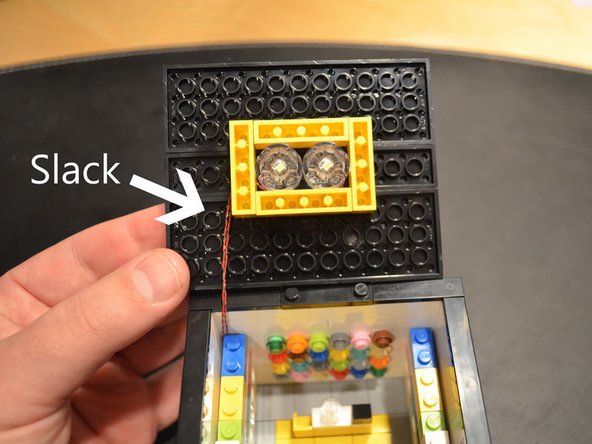
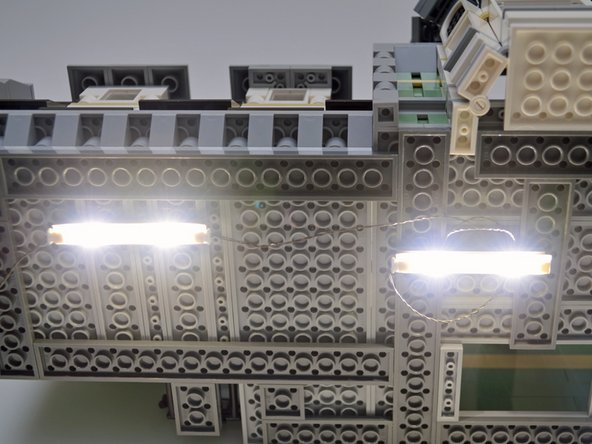
When installing Light Strips in a LEGO® creation, you can use the 1x6 plate the strip is mounted on to hide slack in the wires. Loop the connecting cable underneath the plate property the Lite Strip as shown in the illustrations.
-
-
-
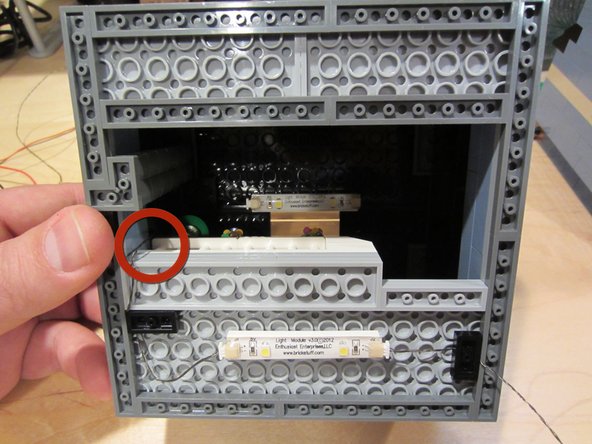
Use the holes and pathways you identified earlier to run wires between floors or between areas of your creation.
-
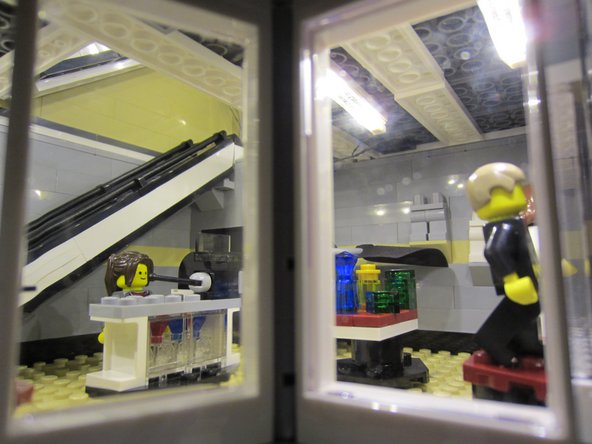
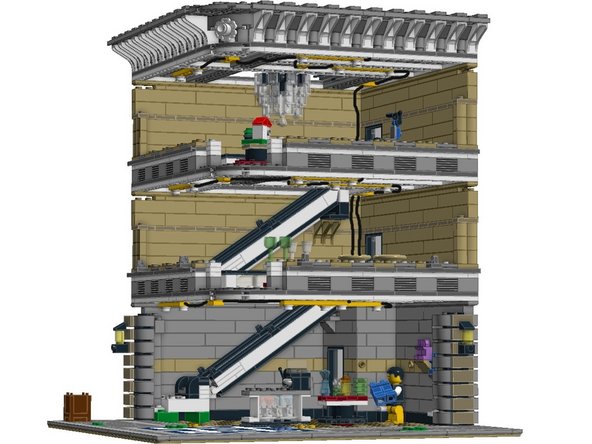
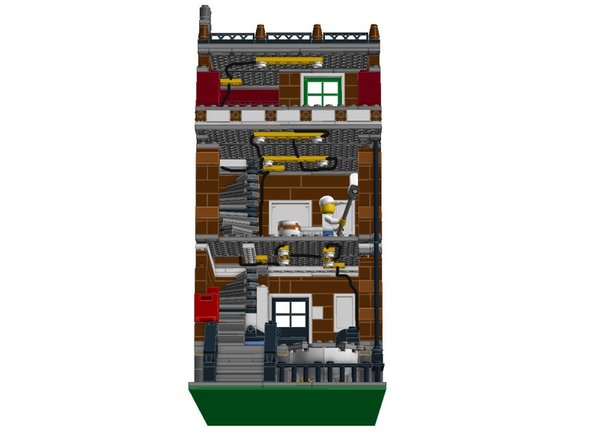
The showtime photograph in this step shows a feeder wire from an upper flooring passing through a balustrade opening.
-
The second photo shows a feeder wire passing behind a spiral staircase from a higher floor.
-
The third photo shows multiple feeder wires passing through an opening behind an escalator. If yous use the Dwelling Run wiring arrangement, you volition need to run multiple feeder wires to the ground level or exit point of your cosmos, so continue an eye out for pathways capable of holding several wires.
-
Also in the 3rd photo, an adapter board was needed and was able to fit directly into a ceiling crenel. The adapter board is held in identify with two 1x2 LEGO® plates.
-
-
-
earlier finalizing your installation it is a good idea to test all of your lights to make sure they operate, and too to make sure they are positioned correctly to deliver the effect y'all want.
-
Information technology is besides important to make sure that you take enough slack in your wiring installation, and then plugs and connections won't be tugged or pulled when y'all elevator roofs, open doors, etc.
-
-
-
While you are checking for sufficient slack, also don't forget to make sure yous have slack in your feeder wires, to permit them to laissez passer through floors and sections without pulling.
-
-
-
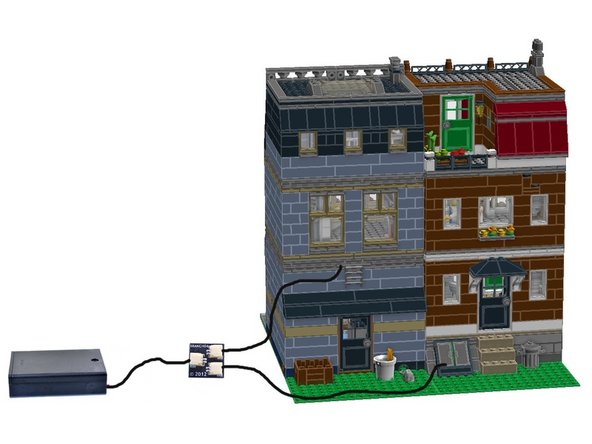
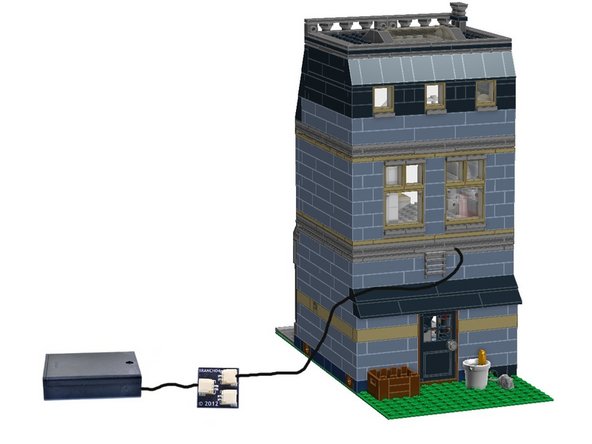
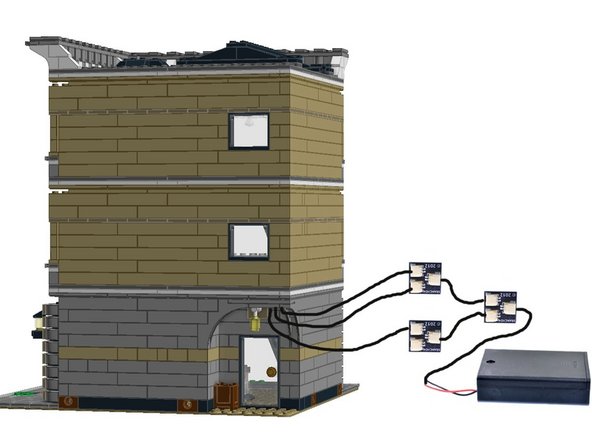
Once everything looks good, connect your power supply.
-
The Brickstuff lighting organisation is designed to support upwards to 100 lights or more on a single cord, and so you lot can easily ability a cake of buildings or a very big creation with a single power source.
-
Many of our lighting kits include a battery pack, but in that location are many other options for powering your installation. We also offer "wall wart" power supplies and the ability to run from portable USB batteries, so you have a full range of options to go along your installation shining bright! Meet our website for full product details.
-
With a piffling advanced planning and some experimenting, you may observe means to conceal your power supply inside your creation, further enhancing the effect!
-
-
-
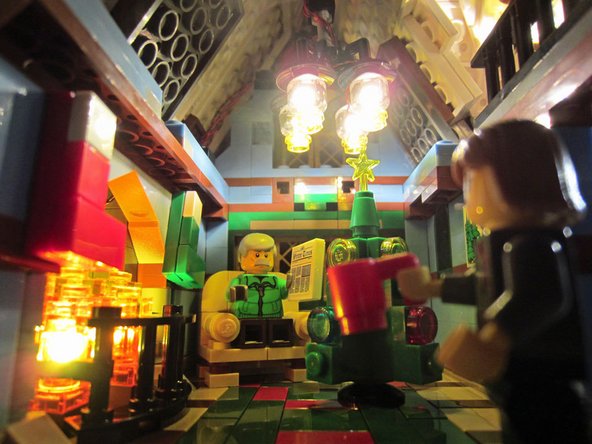
About importantly, take fun with what you lot have built! Nosotros promise our lights will help you bring all of your creations to life. Delight requite usa feedback on this guide, or visit our website to send usa your thoughts and requests. Thank you for existence a Brickstuff customer!
-


Embed this guide
Cull a size and re-create the code below to embed this guide every bit a small widget on your site / forum.
Preview

How To Light Up Lego Sets,
Source: https://brickstuff.dozuki.com/Guide/Lighting+LEGO%C2%AE+Modular+Buildings/6
Posted by: spencercoccousturia.blogspot.com
0 Response to "How To Light Up Lego Sets"
Post a Comment